I have to admit that I went many years just saying something like, "we will be looking for the malzers and papee on the left, if we don't see them we'll be going missed . . ." but I didn't really appreciate what those malzers or alsaffs were. Then someone in our 747 squadron came inches away from landing on the wrong runway and we all got serious about this stuff. So here is a description of most of the systems you are going to see out there and a few photos.
— James Albright

Updated:
2013-08-01
I drew the diagrams based on descriptions in FAA Order JO 6850.2B Visual Guidance Lighting Systems, which contain diagrams of much greater detail. The drawings here are presented as a pilot's guide as to what should appear when looking forward from row one of the airplane.
1
Why knowing the lights is important
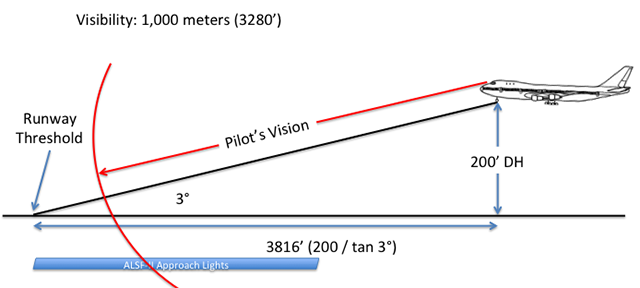
In many landing scenarios where you are at minimums, the approach has been designed so that you will NOT see the runway but you will see the approach lights. In a typical ILS, those lights permit you to continue the approach to 100' above the runway at which point the geometry then will allow you to see the runway.
2
Approach lighting
Threshold Lighting
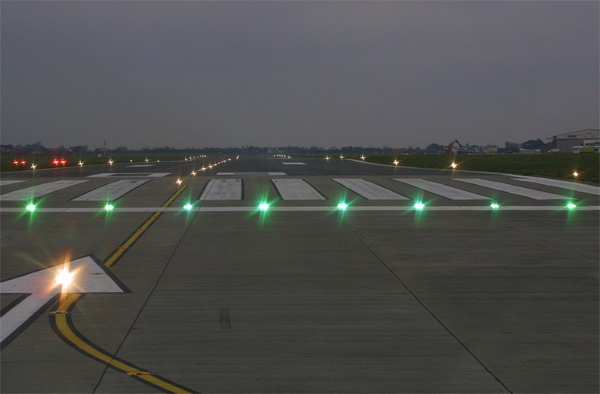
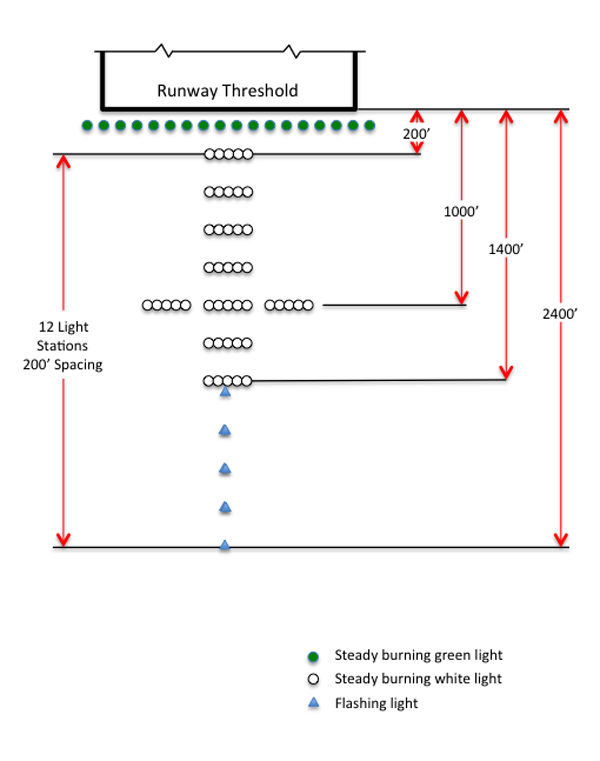
A row of green lights on 5 foot centers extending across the runway threshold and outwards a distance of approximately 45 feet from the runway edges. Caution: Can be up to 10 feet from the landing surface without a waiver.
Source: AFAIS
The threshold lights will divide a displaced threshold and the usable runway. All "A" series approach lights have threshold lights.
Centerline Lighting
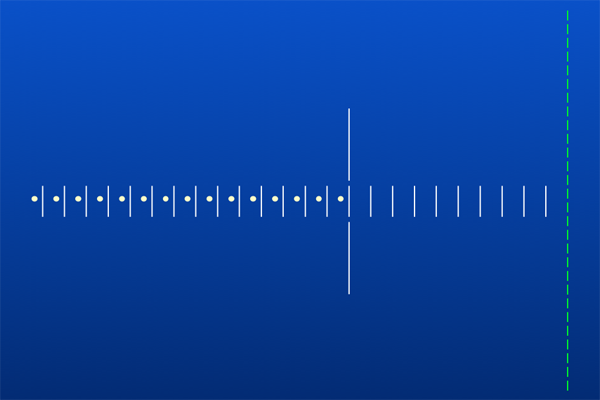
Centerline lights are rows of 5 lights, 13.5 feet wide, typically spaced 100 feet apart, which extended 2,400 feet from the threshold if the glide slope is 2.75 degrees or greater, 3,000 feet if the glide slope is less than that. At a military field they could be as short as 2,000 feet.
Source: AFAIS
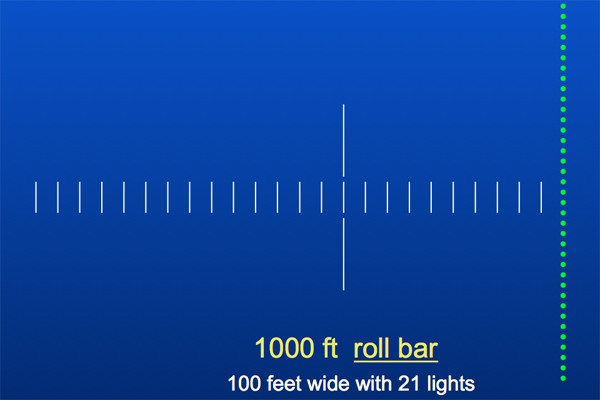
Roll Bars
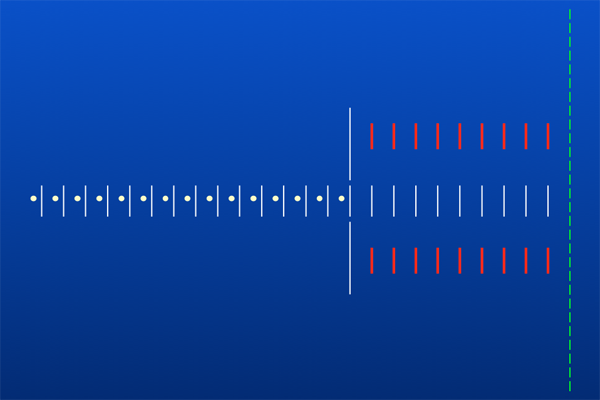
Two additional light bars are placed outside of the centerline light at 1000". Each additional bar would have 8 lights, giving a total of 21 (8+8+5).
Source: AFAIS
The centerline lights are useful for runway alignment but can be misleading absent any other cues. The roll bar provides the third dimension.
Sequenced Flashing Lights
Sequenced flashing lights flash in sequence toward the threshold at a rate of twice per second and terminate at the 1,000 foot roll bar.
Source: AFAIS
Runway Alignment Indicator Lights (RAILS)
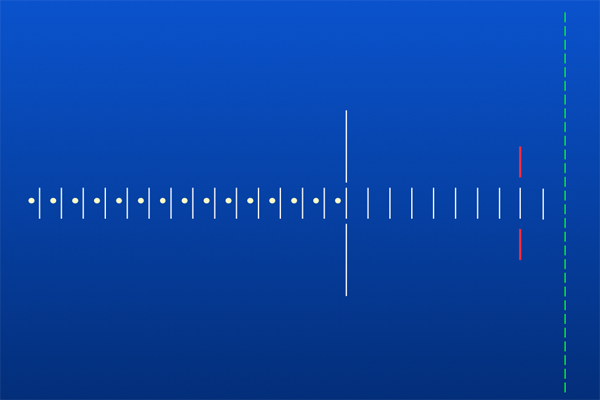
Runway alignment indicator lights are sequenced flashing lights. Note that they extend out beyond the centerline lights at 200' spacing. RAILs and sequenced flashing lights are virtually identical. We call them "sequenced flashing lights" when they are located with the centerline lights. We call them RAILs when they extend beyond the centerline lights.
Source: AFAIS
Side Row Bars
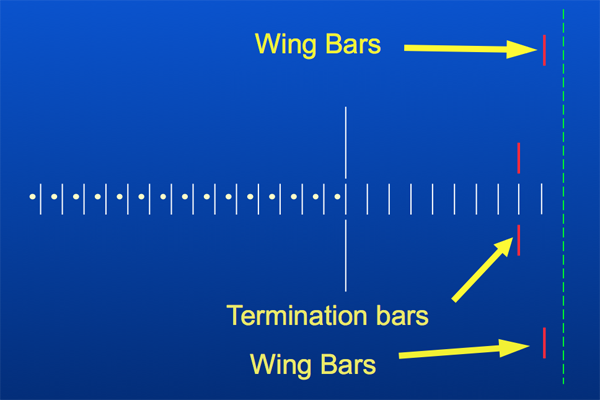
Side row bars are three red lights each on either side of centerline and begin at 1,000 feet remaining.
Source:AFAIS
Termination Bars
The termination bar is 50 feet wide with 11 red lights either side of centerline and 200 feet from the end.
Source: AFAIS
Operation below DA/ DH or MDA. Except as provided in paragraph (l) of this section, where a DA/DH or MDA is applicable, no pilot may operate an aircraft, except a military aircraft of the United States, below the authorized MDA or continue an approach below the authorized DA/DH unless—
(1) The aircraft is continuously in a position from which a descent to a landing on the intended runway can be made at a normal rate of descent using normal maneuvers, and for operations conducted under part 121 or part 135 unless that descent rate will allow touchdown to occur within the touchdown zone of the runway of intended landing;
(2) The flight visibility is not less than the visibility prescribed in the standard instrument approach being used; and
(3) Except for a Category II or Category III approach where any necessary visual reference requirements are specified by the Administrator, at least one of the following visual references for the intended runway is distinctly visible and identifiable to the pilot:
(i) The approach light system, except that the pilot may not descend below 100 feet above the touchdown zone elevation using the approach lights as a reference unless the red terminating bars or the red side row bars are also distinctly visible and identifiable.
(ii) The threshold.
(iii) The threshold markings.
(iv) The threshold lights.
(v) The runway end identifier lights.
(vi) The visual approach slope indicator.
(vii) The touchdown zone or touchdown zone markings.
(viii) The touchdown zone lights.
Source: 14 CFR 91, §91.175 (c)
If you are descending below 100 feet based on the approach lights, you must either see the red terminating bars or the side row lights. In other words, if you do not see either set of red lights you must see the runway itself.
500 Foot Roll Bars
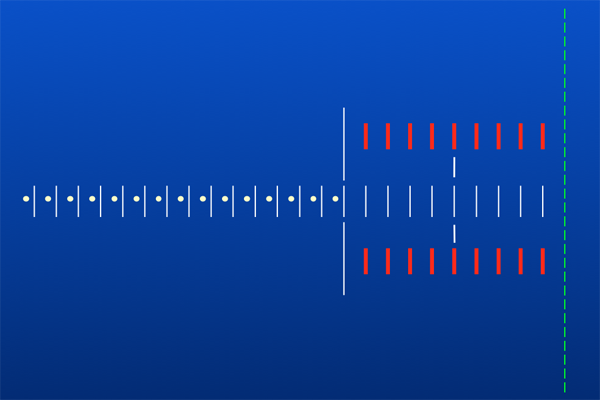
With weather at minimums for a Category II ILS, 1200 RVR, you might lose sight of the 1000' roll bar underneath the nose of the aircraft before you can see the threshold lights (which can also function as a roll bar). The 500' roll bar bridges that gap so that you should always have at lest one roll bar in sight. The 500 foot roll bars are one additional bar each side of the 500' centerline bar with 4 lights each.
Source: AFAIS
Wing Bars
Landing between the wing bars ensures you will be on the runway laterally.
Source: AFAIS
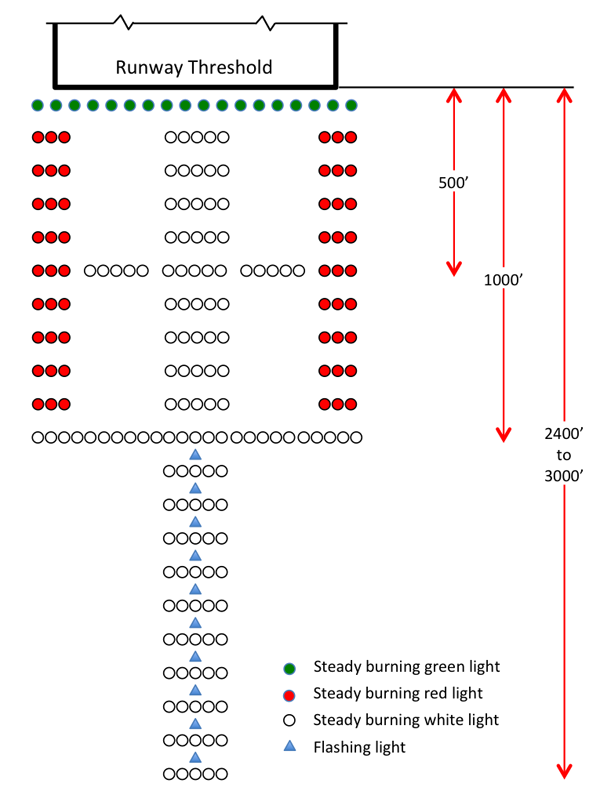
High Intensity ALS with Sequenced Flashers (ALSF-2)
Used on category II and III precision approach runways.
Source: FAA Order JO 6850.2B, ¶15.e.
At the 1,000 foot "Roll Bar" you are about 2,000 feet from touchdown, about a third of a mile. You should be about 100 feet AGL at this point.
The sequenced flashers begin between a half and three-quarters of a mile from touchdown. You should be about 300 feet AGL at this point.
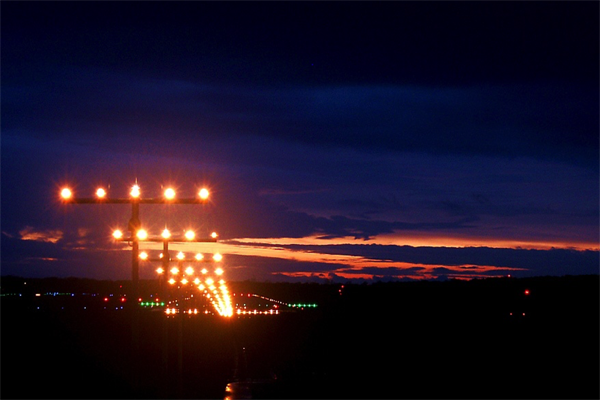
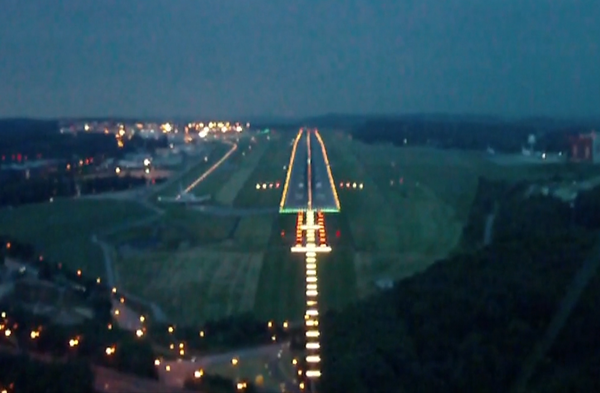
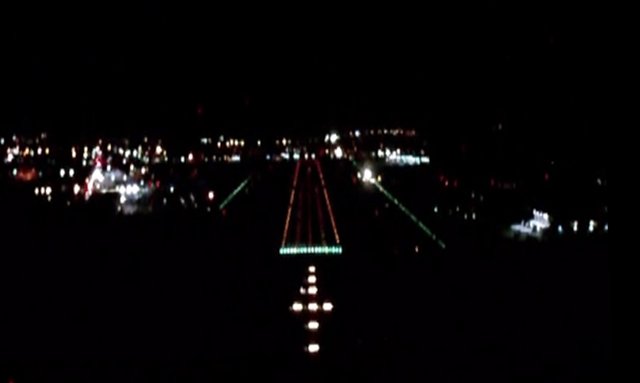
Example: ELLX Rwy 06
ALS with Sequenced Flashers (ALSF-1)
Medium Intensity Approach Lighting System (MALS)
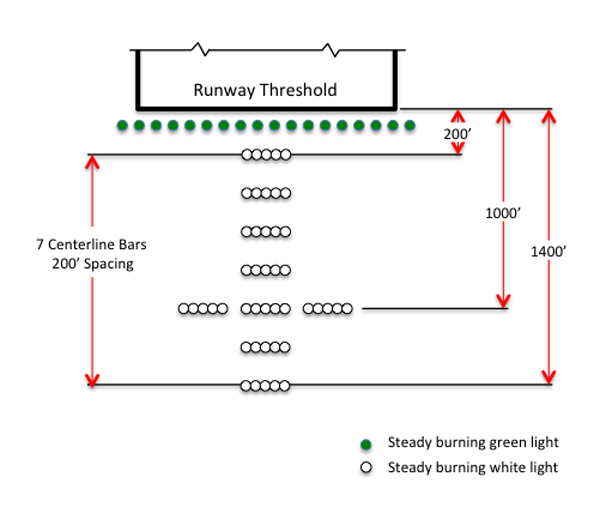
Medium Intensity Approach Lighting System (MALS)
An economy type system for non precision approaches.
Source: FAA Order JO 6850.2B, ¶15.a.
At the 1,000 foot “Roll Bar” you are about 2,000 feet from touchdown, about a third of a mile. You should be about 100 feet AGL at this point.
Medium Intensity Approach Lighting System (MALS)
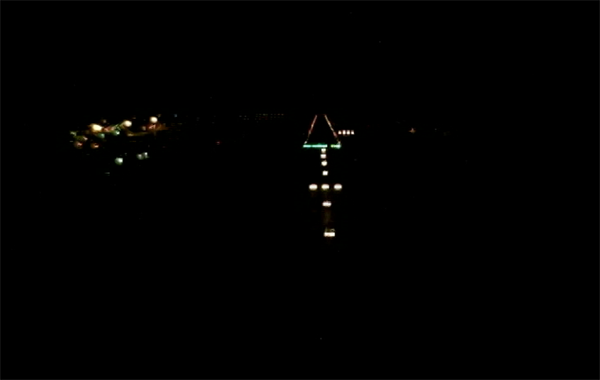
Example: KBED
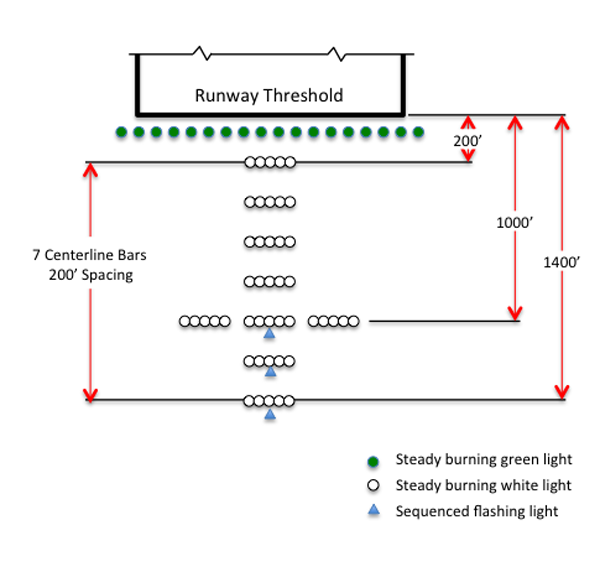
Medium Intensity Approach Lighting System with Sequenced Flashers (MALSF)
Same as MALS, but equipped with three sequenced flashers at locations where approach area identification problems exist.
Source: FAA Order JO 6850.2B, ¶15.b.
At the 1,000 foot “Roll Bar” you are about 2,000 feet from touchdown, about a third of a mile. You should be about 100 feet AGL at this point.
Note: the Simplified Short Approach Lighting System with Sequenced Flashers (SSALF) appears identical to the MALSF.
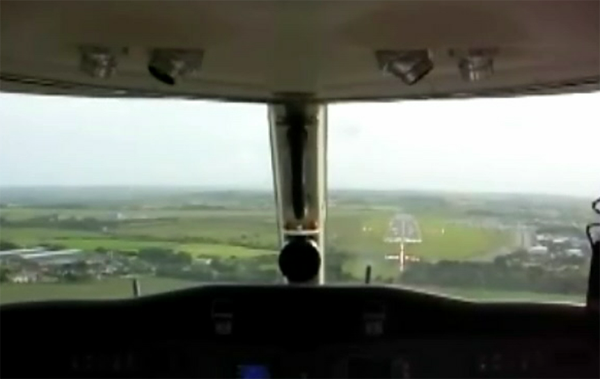
Example: EICK
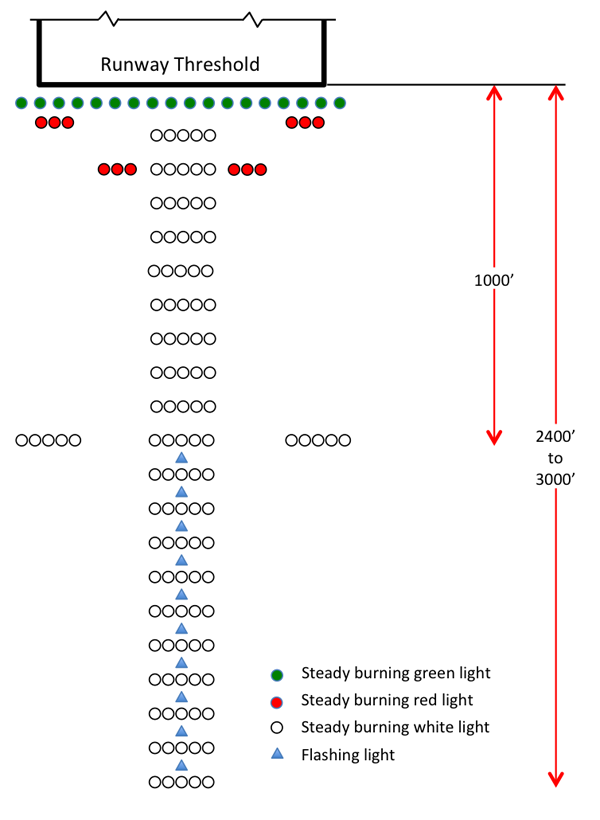
Medium Intensity Approach Lighting System with Runway Alignment Indicator Lights (MALSR)
An economy type system used as the FAA standard for category I precision runways.
Source: FAA Order JO 6850.2B, ¶15.c.
At the 1,000 foot “Roll Bar” you are about 2,000 feet from touchdown, about a third of a mile. You should be about 100 feet AGL at this point.
The sequenced flashers begin between a half and three-quarters of a mile from touchdown. You should be about 300 feet AGL at this point.
Note: the Simplified Short Approach Lighting System with Runway Alignment Indicator Lights (SSALR) appears identical to the MALSR. It is an older system used when category I conditions exist on category II designated runways with a dual mode approach lighting system (ALSF-2/SSALR).
Example: KTEB Rwy 06
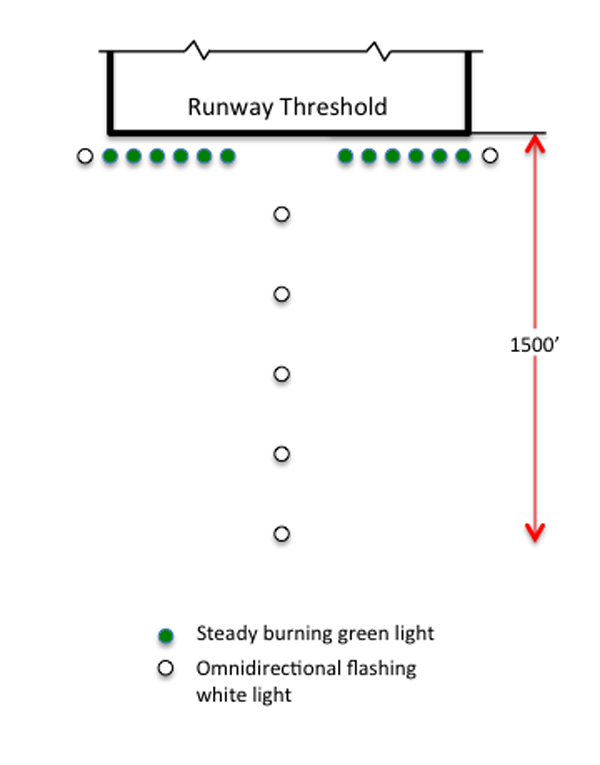
Omnidirectional Approach Lighting System (ODALS)
The ODALS is a configuration of seven omnidirectional sequenced flashing lights located in the runway approach area. The ODALS provides circling, offset, and straight-in visual guidance for non-precision approach runways.
Source: FAA Order JO 6850.2B, ¶15.f.
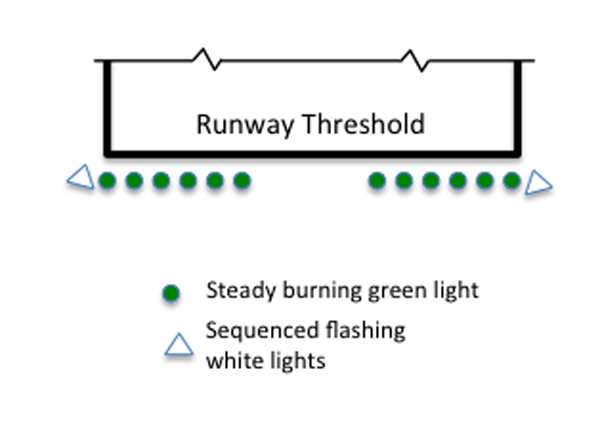
REILs are installed at many airfields to provide rapid and positive identification of the approach end of a particular runway. The system consists of a pair of synchronized flashing lights located laterally on each side of the runway threshold. REILs may be either omnidirectional or unidirectional facing the approach area.
Source: Aeronautical Information Manual, §2-1-3
Visual Approach Slope Indicator (VASI)
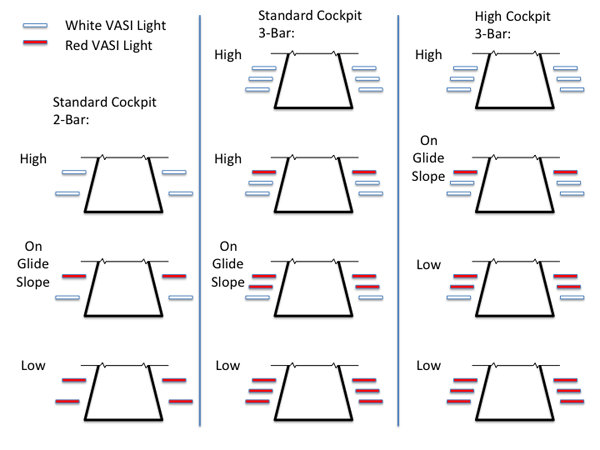
The basic principle of the VASI is that of color differentiation between red and white. Each light unit projects a beam of light having a white segment in the upper part of the beam and red segment in the lower part of the beam. The light units are arranged so that the pilot using the VASIs during an approach will see the combination of lights shown.
Source: Aeronautical Information Manual, §2-1-2. ¶a.3.
Pilot of high cockpit aircraft, the Boeing 747 for example, could touch down short of the runway if using standard 2-Bar VASI or the first two bars of a 3-Bar VASI. See Deck Angle for a discussion of the geometry behind this. High cockpit crews need only remember to use the far bars of a 3-Bar VASI and to ignore the first set of bars. Standard cockpit crews always use the first two set of bars.
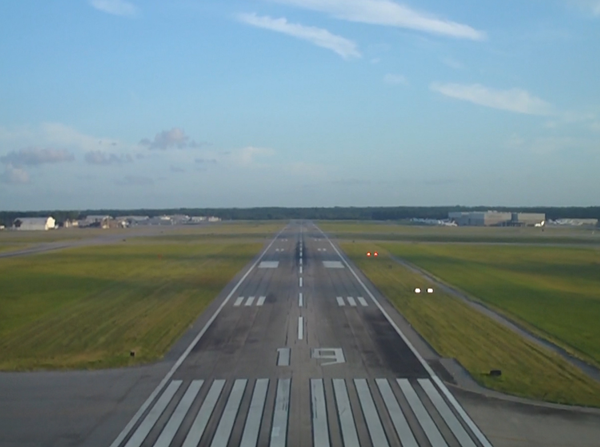
Example: (Four box system, KSAV, Runway 19)
Precision Approach Path Indicator (PAPI) System
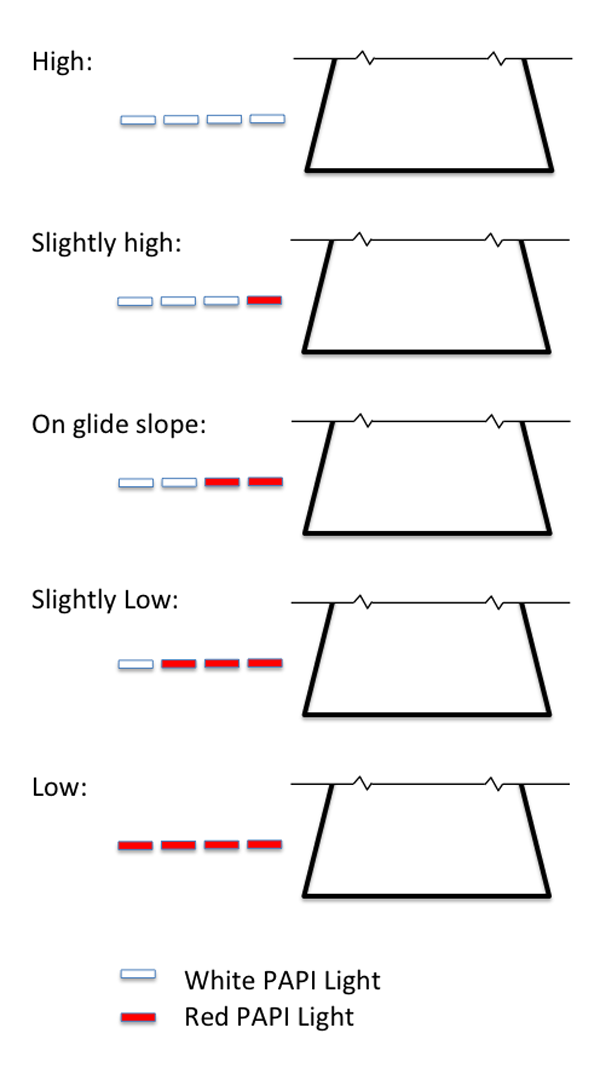
The precision approach path indicator (PAPI) uses light units similar to the VASI but are installed in a single row of either two or four light units. These lights are visible from about 5 miles during the day and up to 20 miles at night. The visual glide path of the PAPI typically provides safe obstruction clearance within plus or minus 10 degrees of the extended runway centerline and to 4 SM from the runway threshold. Descent, using the PAPI, should not be initiated until the aircraft is visually aligned with the runway. The row of light units is normally installed on the left side of the runway and the glide path indications are as depicted. Lateral course guidance is provided by the runway or runway lights. In certain circumstances, the safe obstruction clearance area may be reduced due to local limitations, or the PAPI may be offset from the extended runway centerline.
Source: Aeronautical Information Manual, §2-1-2. ¶b.
References
(Source material)
14 CFR 91, Title 14: Aeronautics and Space, General Operating and Flight Rules, Federal Aviation Administration, Department of Transportation
Aeronautical Information Manual
AFAIS, Air Force Advanced Instrument Instructors Course. The material is provided to the public now and then, depending on the current attitudes in the Air Force about sharing. (I attended the course in 1985 and have had the slides given to me now and then. Off the record, of course.)
FAA Air Traffic Organization Policy, Visual Guidance Lighting Systems, Order JO 6850.2B, 8/20/10
